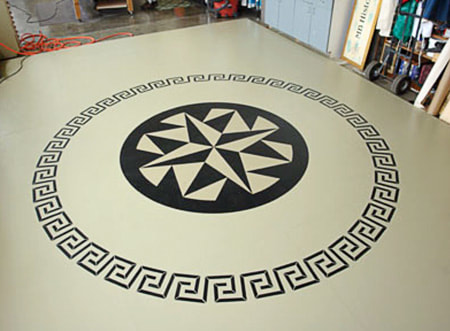
by Ken Forcier, Gracewood Design.
www.gracewoodesign.com
www.gracewoodesign.com
Floor Preparation
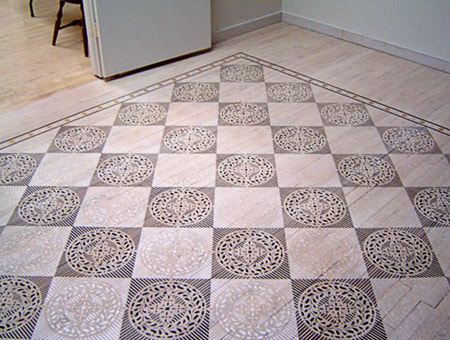
Stencils can be applied to most any wood or painted floor to great effect. The ideal situation is a floor that has been nicely sealed and cured with its first coat of polyurethane. We recommend lightly sanding the surface and vacuuming it clean. With this preparation the stenciling will both adhere and there will be the ability to easily wipe away any issues that arise and redo them as they will not have penetrated the wood. Once stenciled, the floor will be ready to receive two or three additional layers of protective polyurethane.
Pattern Layout
|
Plan the layout. If your pattern involves two stencil motifs, a border and a body (interior portion), you will want to understand in advance how the body meets the border depending on your placement. Most stencils have indexing marks for spacing that are tiny punched holes in each corner of the stencil. These holes line up over one another as you repeatedly place the stencil across the room. They represent the exact length of each repeat and give you the ability to calculate the number of placements across the room in each direction. Rooms are rarely sized for a "perfect fit" where a full motif of the body pattern nicely joins to the border with ideal spacing on each side of the border pattern. Take note if the room is out of square or if a wall is less than straight. Adjustments can be planned such that the border is slightly further from, or tighter to, the baseboard. You can also split the spacing adjustment with the body portion of the pattern. There are no hard and fast rules except for what pleases the eye and a little shift in the pattern rarely draws the eye. Stencil artists of old would often just crop where they had to and the effect was still stunning.
|
Physical Layout
|
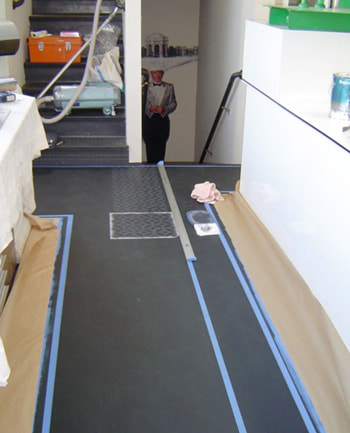
Once you understand the dimensions of the room and you are comfortable with the spacing that you expect for the border, plan to stencil the body of the room first. Mark the centers of the walls in each direction on painters tape. Check these points for square using diagonal measurements from one point to the next around the room. If all of your measurement are the same, your room is square. If they are not, you know your room is out or square to some degree and you may need to consider this factor in your layout. Within a half to three quarters of an inch is probably something that will be nicely absorbed in the spacing at the border. It is always best to check your center marks again if this measurement suggests an error.
In the direction that the flooring planks, create a center line across the room by stretching and affixing a piece of thread between the wall center points (an inexpensive construction laser is a more portable and time saving tool). From that center line, by math or by physical measure using the stencil itself as a tool, determine the number of stencil repeats to one parallel wall. To use the stencil, put the far indexing mark on the center line and put a piece of tape down under the indexing mark nearer the wall and make a dot through it. Shift the stencil toward the wall and repeat. If there are an odd number of repeats across the room in the direction that you are calculating, it follows that you would be centering the first placement of the stencil on the center line. Once you have established the distance from this center line, repeat the process from the perpendicular center line to find the corner. When you align the indexing mark of the stencil with this corner point and compare the border stencil between the it and the wall, you should get the spacing that you anticipated. Indexing marks are intended as repeat tools for the individual stencil only. There is no specific relationship between the indexing marks from the border stencil to the body stencil. |
Stenciling Tips
|
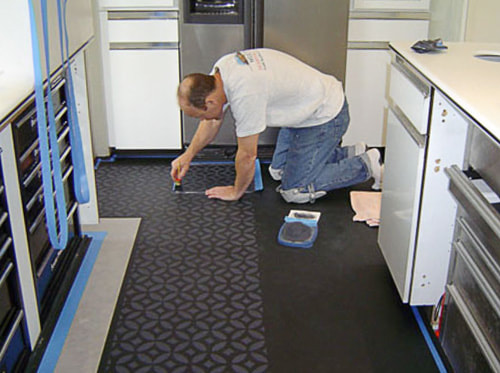
Identify one side of the stencil that faces a landmark in the room and always keep the stencil oriented the same way to get the intended mating of the pattern. Spray the back of the stencil lightly with spray glue like 3M-77 so that it is tacky and let it dry a minute. Begin stenciling from the corner following the direction of the planks.
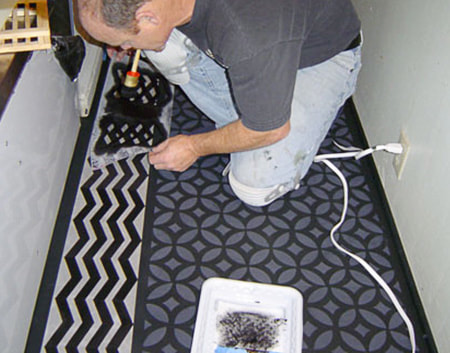
Stencil the pattern with a "dry", flat bottom, stencil brush. You are doing a big area so it should be a big brush to save time. A bristle shoe brush might save you hours and spare some muscle strain in your hand if you are not familiar with the circular motion needed to apply paint with a stencil brush. Both require a circular motion with the flat brush bottom flat to the surface. The shoe brush is more like scrubbing but needs a light touch and great concern for painting off of the edge. The stencil brush is a similar circular motion but you are doing it with a thumb, forefinger and wrist instead of the arm. For either method you pull a small amount of stencil paint from a squeezed stripe on a pallet and rub it into either tool aggressively before proceeding to the stencil. There a gentle touch is required though the pressure can be increased as the quantity of paint the tool holds is diminished. When the work outweighs the benefit, go back for more paint. The paint goes far and the result is rarely a solid color. It is more like a solid stain and there is varying amounts of coverage. This is the norm and is actually expected of the art and an aesthetically pleasing variegation so continue and never go back over what you have done if it has had time to dry (30 seconds). Even black will not always be solidly black but it is blacker than you would have thought when seen under the additional coats of polyurethane. When you move the stencil, peal it up from one edge so that it doesn't shift while in contact with the floor. Holding a hand on the last edge to lift helps. Its not always necessary but can be a good idea to wipe the backside with a drag across a piece of cardboard before moving to the next placement to avoid paint drag. As an added placement tool, after the second stencil placement you can draw the pattern from the first motif as seen through the trailing edge of the stencil. Using a black sharpie, draw portions the pattern with dashed lines on the near and far side of the stencil. Now you no longer need dots on tape for your spacing as you march across the room following your laser or thread line. |
Stencil Maintenance
As you progress you may find that paint builds on your stencil and eventually starts to clog the smaller holes. Some paints clog more than others. A product called "flow medium" used in sparing drops can help redistribute that paint. Never the less, you may have to wash the stencil a number of times for a big room. Do that with a soft brush on a flat surface like the side of a utility sink. Any medium soft, flat bottom, scrub brush will do. Flood with water and be gentle. Stencils are prone to damage if you lift a delicate pointed part from the flat surface while scrubbing. The trade off for being durable mylar is that if bent sharply, it is hard to bend it back and get it to lay flat again. Pat the stencil dry with paper towels and don't work with it if has water still on it. It won't necessarily need more spray stickum with each cleaning but it may be wise if you sometimes forget to hold it down with a hand as well. Finish a big area once you start so you don't get a noticeable change in the consistency of coverage. If you take a break, the paint palette and brush can be covered with a damp cloth for an hour or more.
Adding the Border
The border follows edge of the body pattern at your predetermined distance. The same application and repeat principles apply though the small brush is recommended here. Use a piece of wide masking tape affixed to the stencil to protect the base board from errant stencil brush sweeps. When you reach a corner, before stenciling the floor for that particular lay, tape down a piece of paper at the corner and stencil lightly on it. Turn the corner with the stencil and see where an undesirable overlap happens. The stencil may need a wash to see through it and you will want to mark the index points when you decide it's placement. Tape off the overlapping openings, stencil the floor, remove the tape, turn the corner and continue. Happy stenciling!
